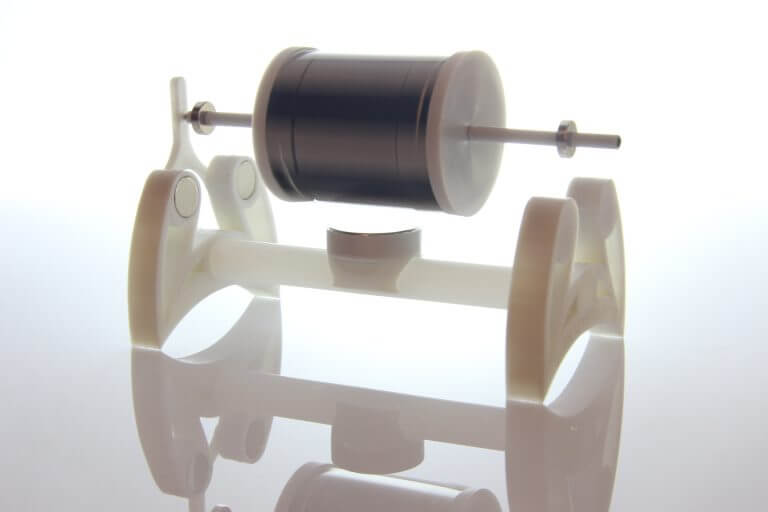
Once again Open DIY Projects presents a 3D model to print yourself, this time a cool solar motor kit.
It is not the first DIY kit that Open DIY Projects makes available to the community. One could already build the WiFree-Copter, the EagleEi Gimbals or the GlobeFlyer. This time it’s a solar motor called littleSunengine, which consists mostly of 3D printable parts.
Source: Open DIY Projects
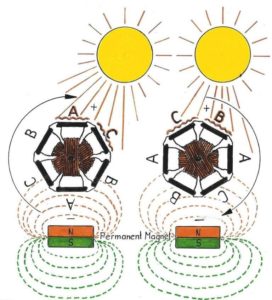
How “littleSunEngine” Works
The incident light is converted into electrical current in the built-in photovoltaic cells, this energy flow is converted into a magnetic field and then into movement with the aid of Lorentz force. “From light to kinetic energy!”
Material List
- PLA-HT from Multec is recommended as printing material, which has already proven for the WiFree Copter. The filament is easy to process, food safe and harmless to health and is therefore also suitable for children.
- Furthermore you need a big N42-25-7 mm magnet for the frame
- For the anchor you need two N40-10×3 magnets with a 3 mm hole
- four N45-12-6mm magnets for the side panels
- three small N48-3×1 mm magnets for the counterholder
- a 0.18 mm thick enamelled copper wire alternatively a 0.15 mm thick copper wire
- 6 photovoltaic cells with 53 mm x 18 mm and 0.5 V
- 2,5mm steel ball (ball bearing)
- 3mm carbon fiber tube with approx. 120 mm (anchor axis)
The magnet set can also be ordered simply from MTS magnets as “Open-DIY-SET” and the 6 photovoltaic cells on the Internet.
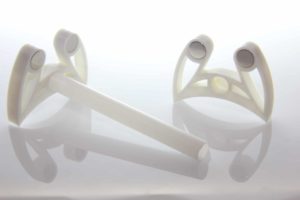
The Building Instruction
Source: Open DIY Projects
The frame is assembled by simple plug connections. Make sure that the magnets in the side parts are aligned correctly. For this you can use a compass or another magnet with N/S marking. The magnets in the side parts must be aligned with the centre of the frame facing south. If the alignment fits so far, you can press the magnets into the side parts by hand by even pressure. Then you connect the two side parts with the 3D-printed tube and let the large magnetic holder snap into the middle of the frame. Be careful with the tube, depending on the print settings it may break if torsion is too strong.
Here it goes on with the building instruction
About Open DIY Projects
Open DIY Projects is a free “join in platform” consisting of a maker community. It provides on a non-commercial basis 3D printable kits, especially Copter, completely Open Source, for download (for registered members). Furthermore, knowledge, experiences and ideas can be exchanged on the site, the community is open for questions and dialogues. For the use of the platform nothing else is required than that one uses his prints exclusively privately and not commercially and is responsible for his printed work itself. If you think the project is good and would like to support it, you can do so voluntarily by using the donation button on their website.
Source: Open DIY Projects, Solar Motor